Create VPC, subnet, Security Group
Create VPC
Make sure you are in the Singapore Region.
- Click Your VPC.
- Click Create VPC.
- At the Create VPC page.
- In the Resources to create section, select VPC and more
- In the Name tag section, enter ASG-ALB-vpc.
- In the IPv4 CIDR section, fill in: 10.10.0.0/16 or leave the default as oke.
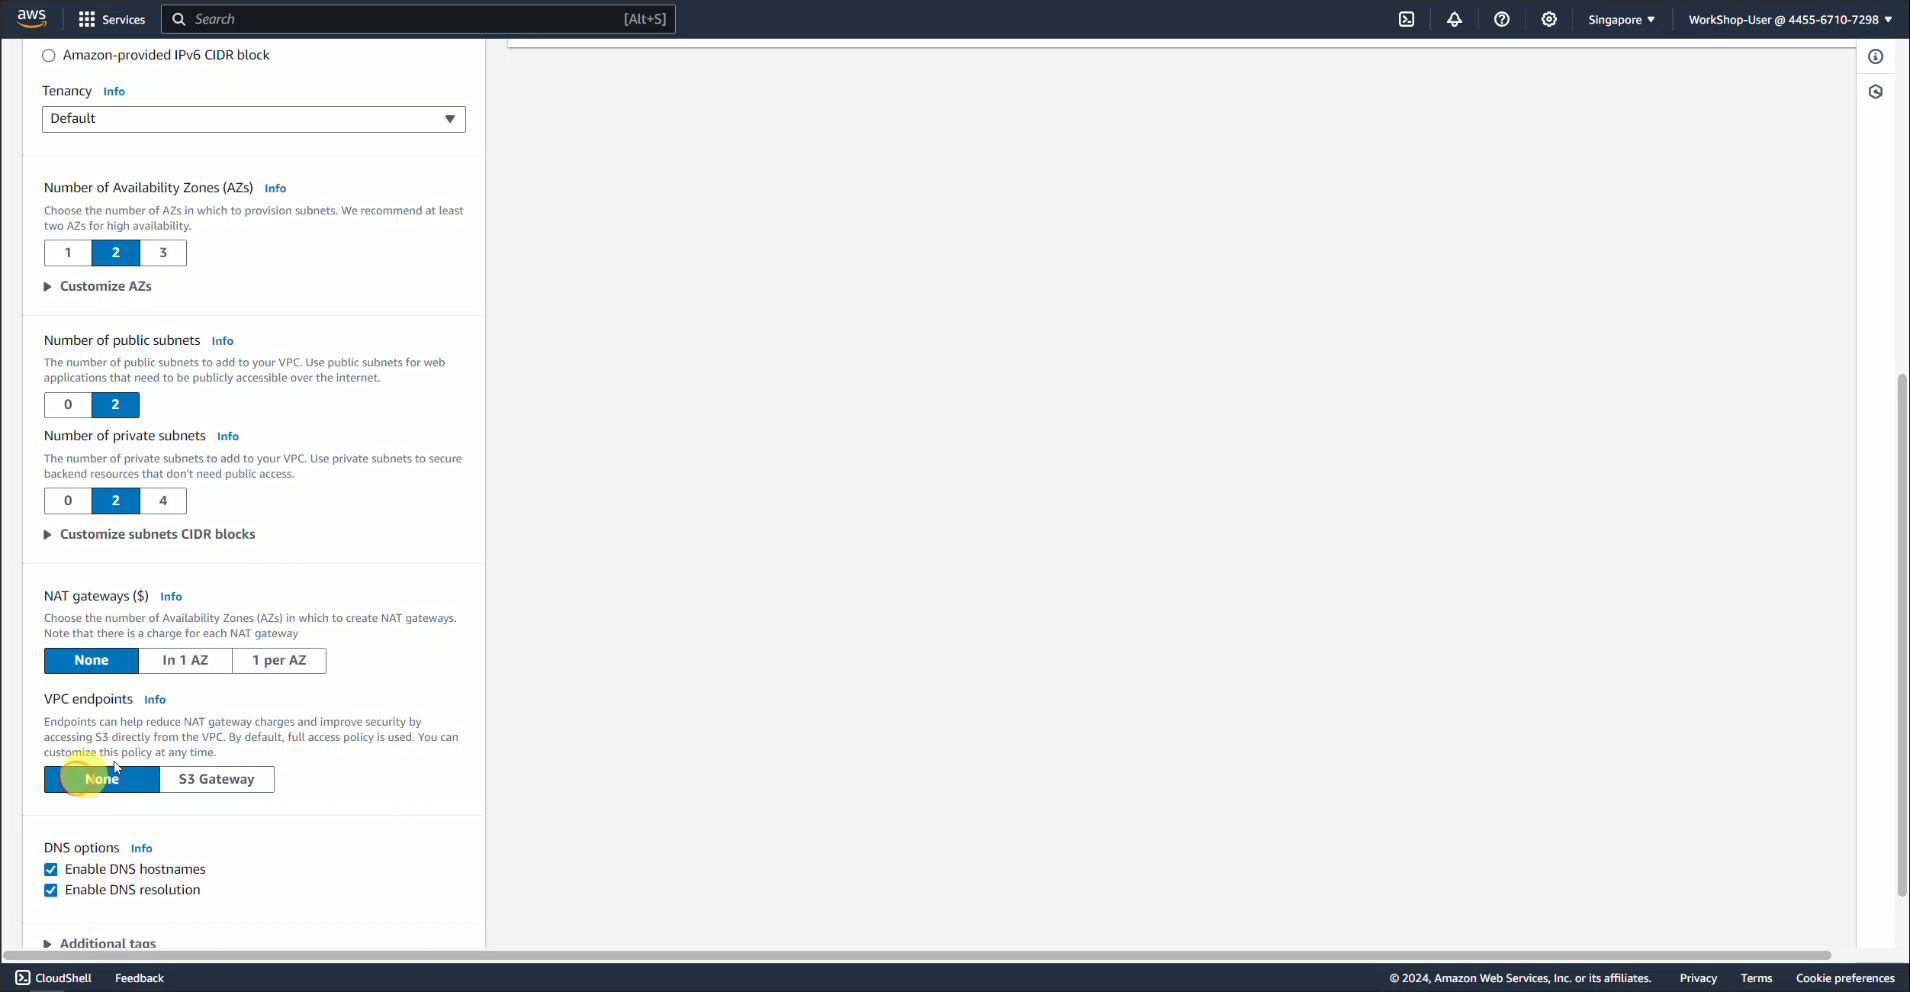
- In the Number of Availability Zones section, select 2
- In the Number of public subnets section, select 2
- In the Number of private subnets section, select 2
- In the NAT gateways section, select 0
- In the VPC endpoints section, select None
- Click Create VPC.
We can configure it like the image below:
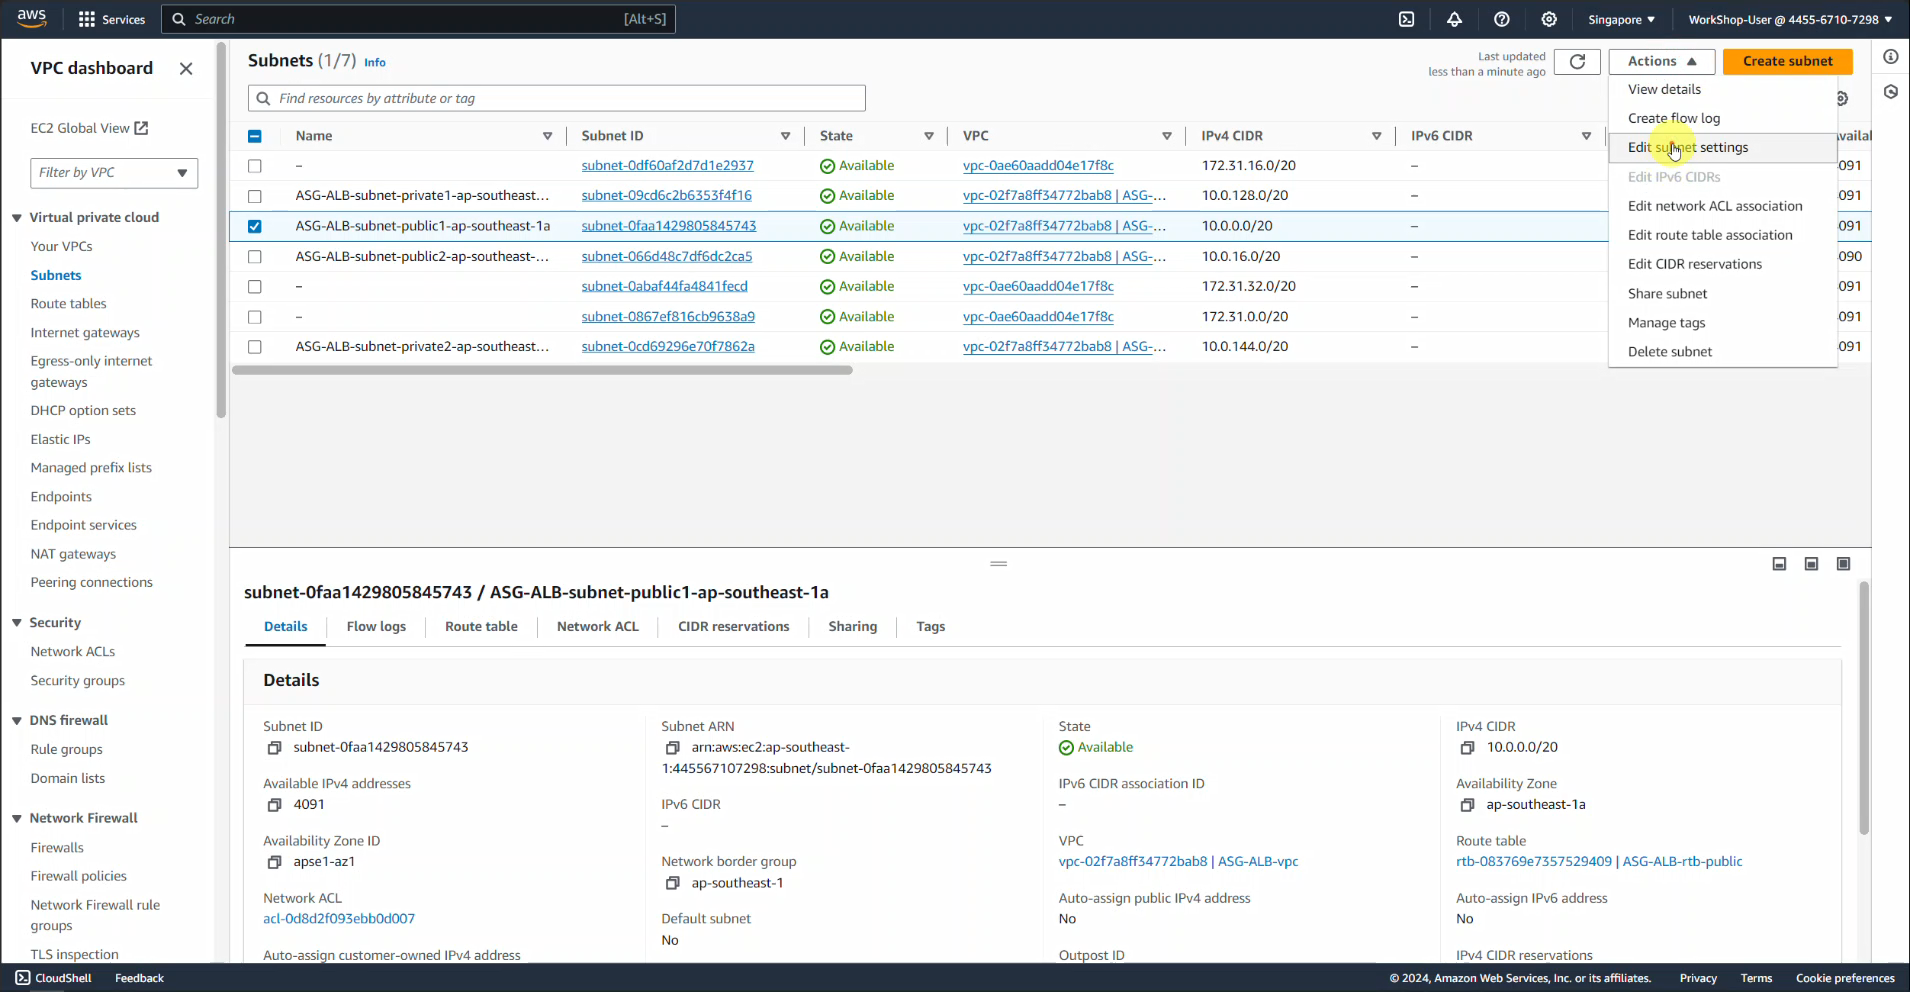
- After creating the VPC and subnets, we need to edit the 2 public subnets as follows:
- Select public subnet, Actions select Edit subnet settings
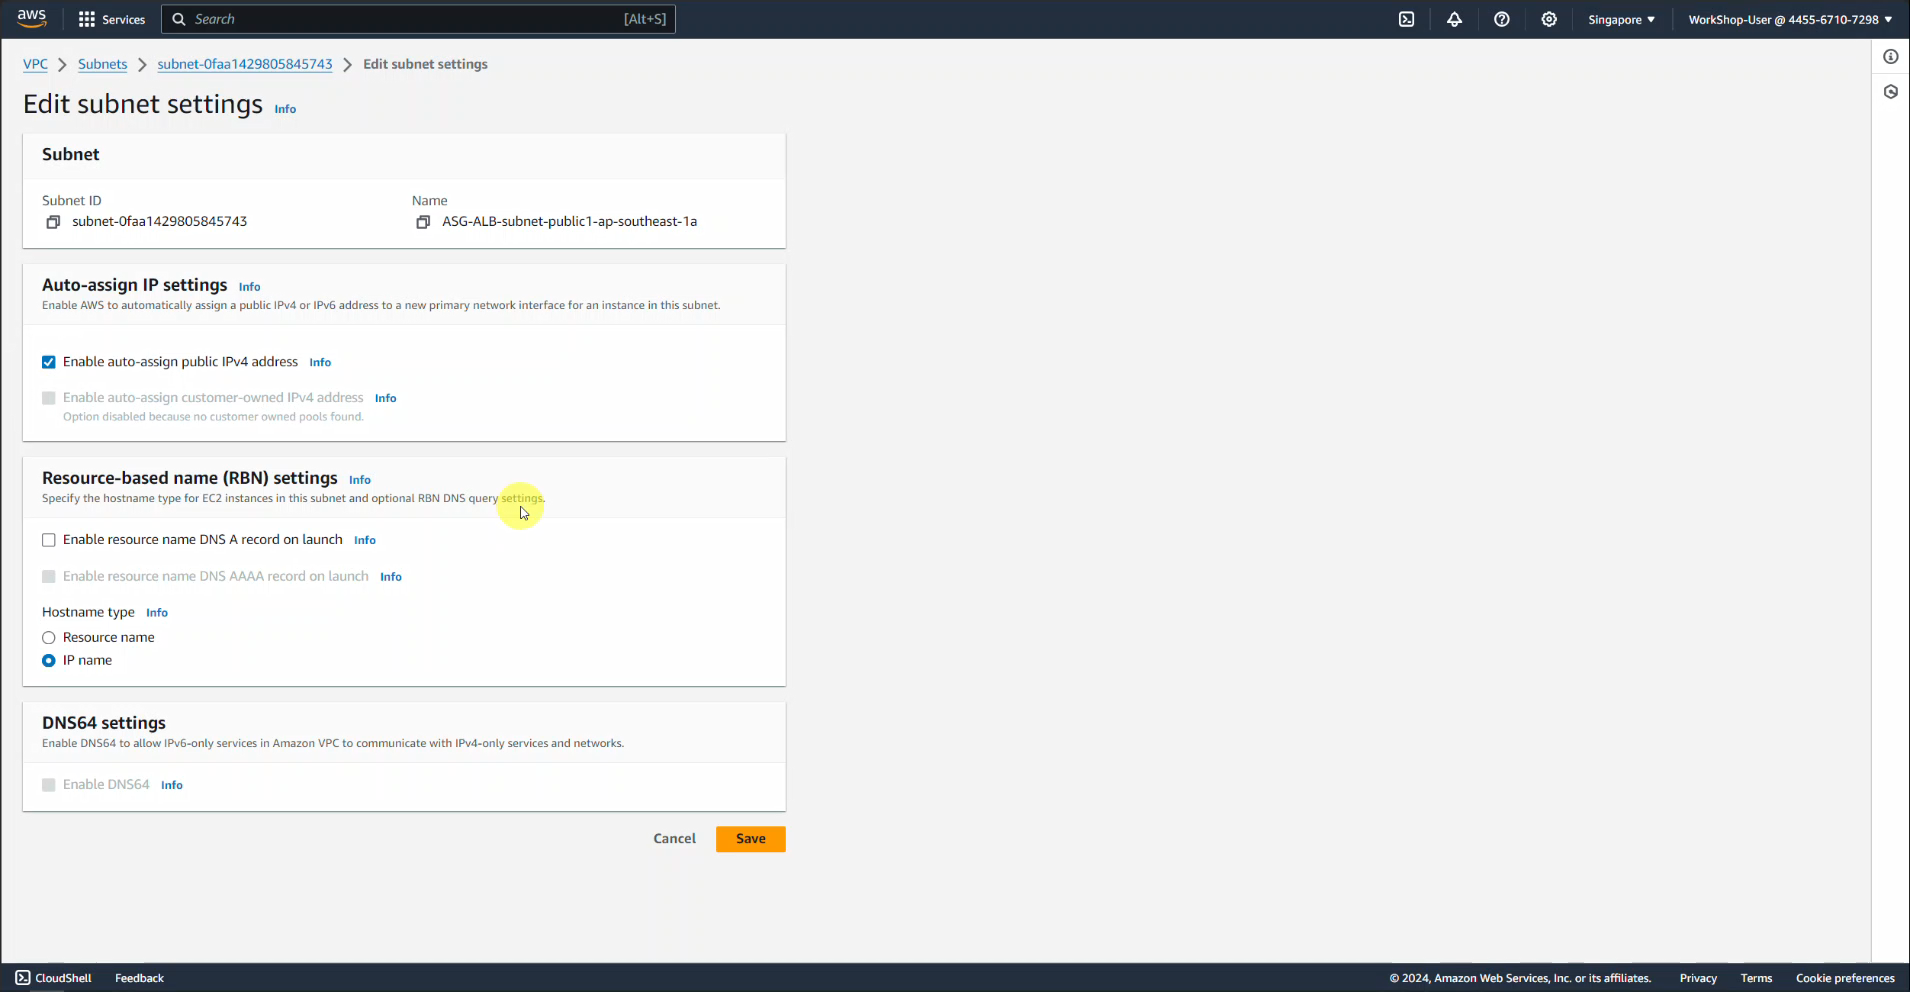
- Check the box Enable auto-assign public IPv4 address
- Click Save and do the same with the remaining public subnet
Task 2: Create a security group (Security Group)
We will create 2 Security Groups, the first is for the Load Balancer, the second is for the EC2s, we will connect the Inbound SG of the EC2 to the SG of the Load Balancer.
-
Make sure you are in the Singapore Region.
-
Navigate to EC2 by clicking on the Services menu available in the Compute section.
-
On the left panel menu, select Security Groups in the Network & Security section.
-
Click the Create security group button.
-
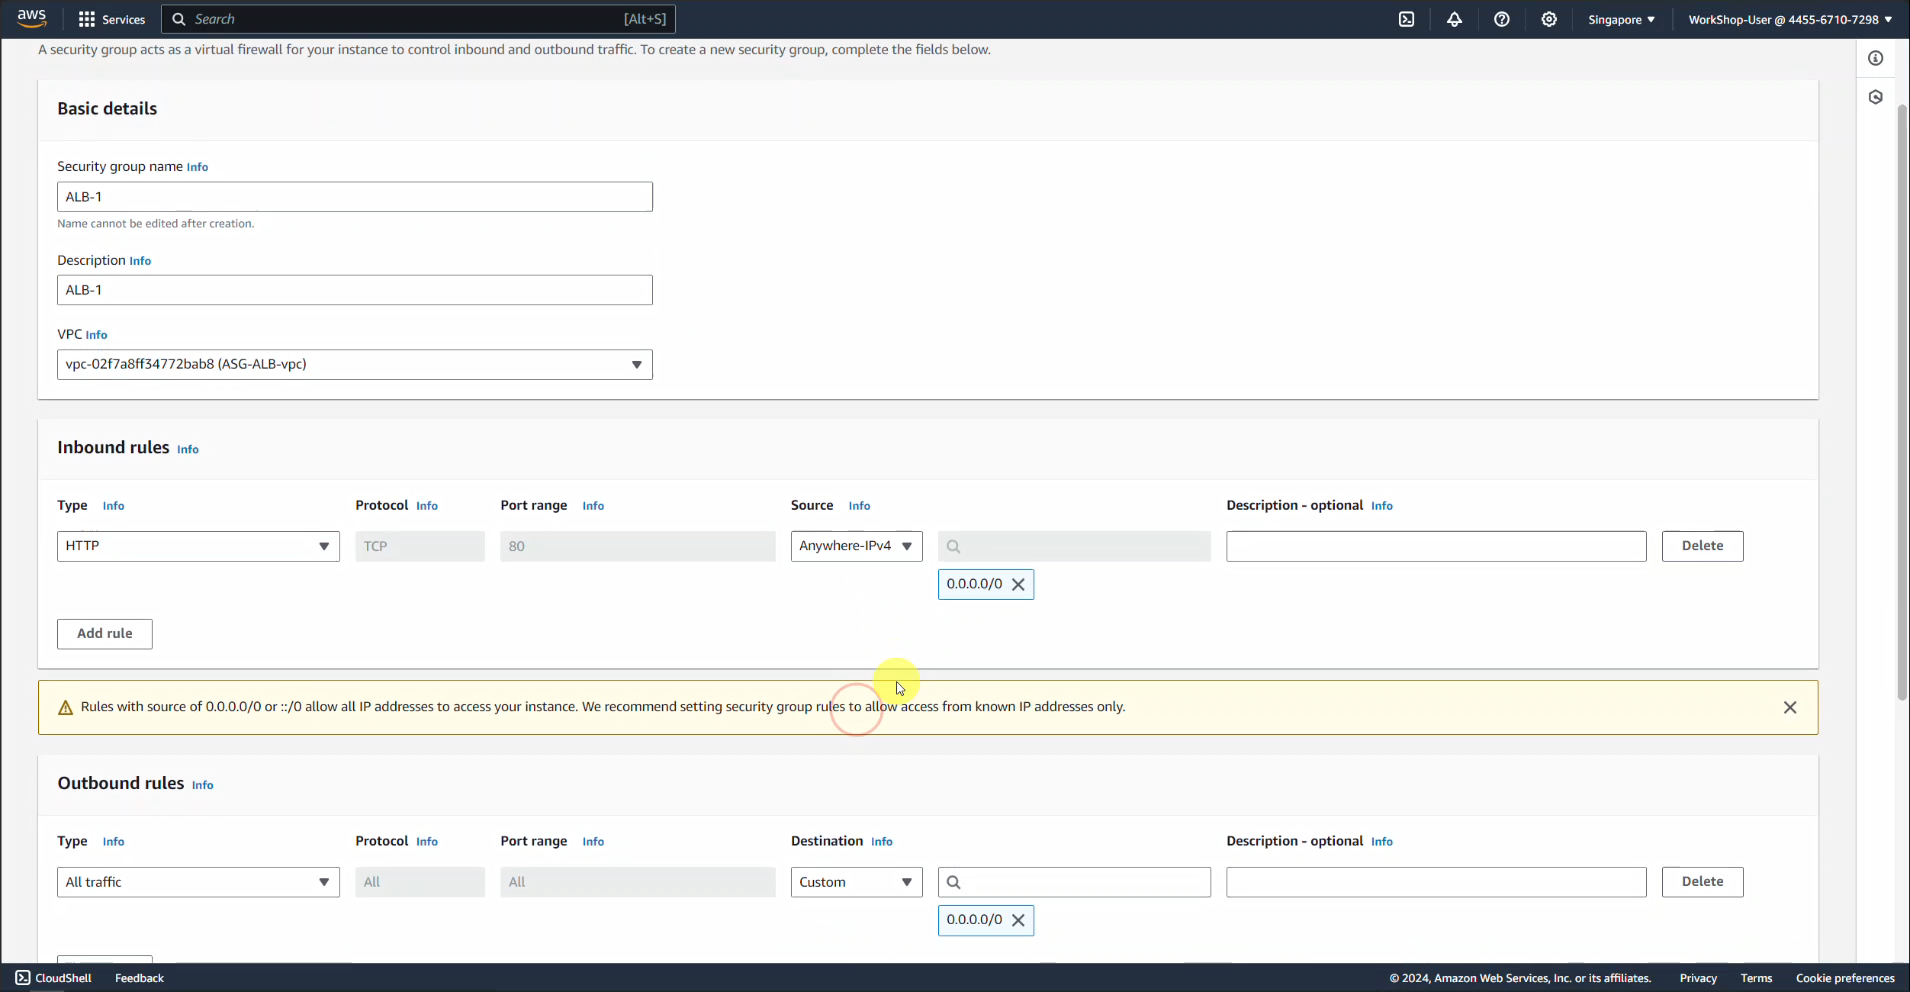
Under Basic details:
- Security group name: Enter ALB-1
- Description: enter ALB-1
- VPC: Select ASG-ALB-vpc that we just created earlier
- Click the Add rule section under the Inbound rules section
- Type : Select HTTP
- Source : Select Anywhere-IPv4
-
Leave everything as default and click the Create security group button
-
Click the Create security group button.
Next we create a second security group for EC2 Instance
- Under Basic details:
- Security group name: Enter Web-1
- Description: enter Web-1
- VPC: Select ASG-ALB-vpc that we just created earlier
- Click the Add rule section under the Inbound rules section
- Type : Select HTTP
- Source : Select Custom
- In the search box: type sg and select security group of ALB-1
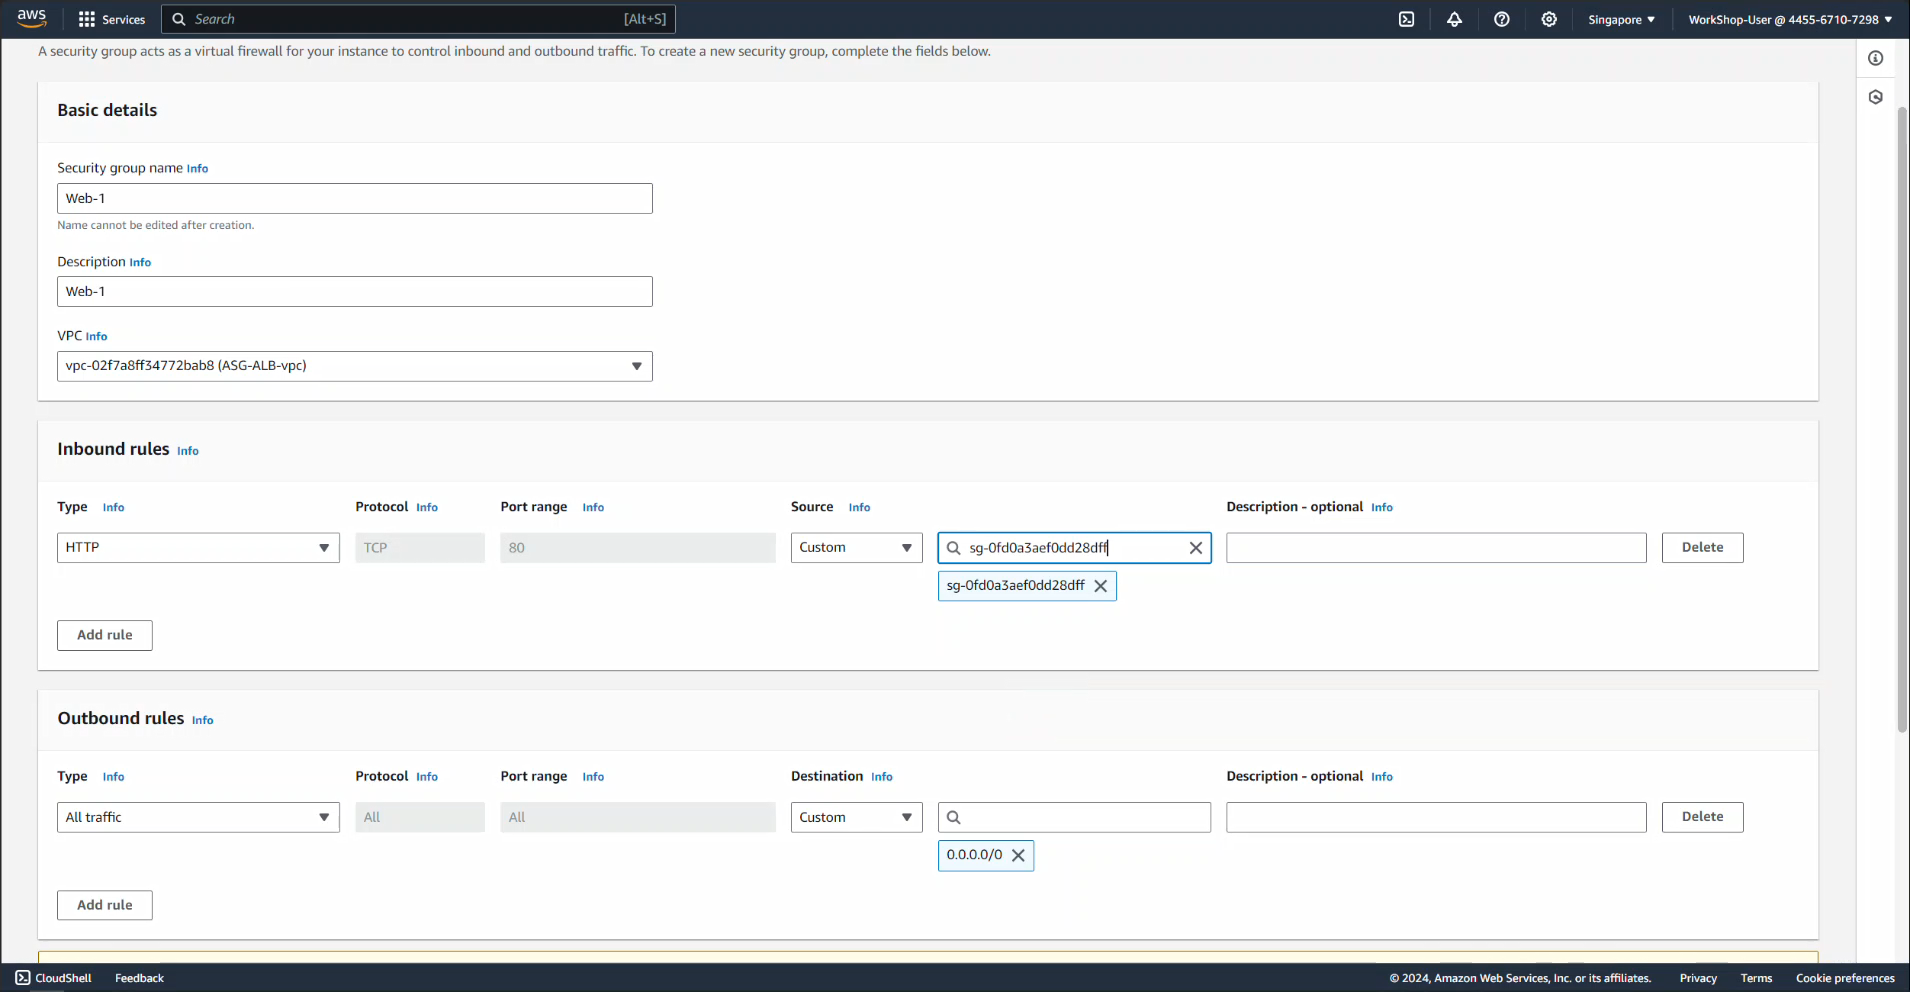
- Leave everything as default and click the Create security group button